Sunday, December 16, 2012

Spring : Working with MessageSource to Achieve internationalization in your Application

Spring provide the support to print locale specific message inside the application in a very elegant manner and some how it uses it dependecy Injection to achieve this feature fromm the org.springframework.context.MessageSource class.

let us figure out the way to achieve the internationalization of your application with the spring MessageSource Class.To construct this example I have created two resouce bundle one is for US_EN and another is for the Japanese.For Japanese Resource bundle I have used the unicode char(UTF-8).

Step 1:Let us create a simple java project(include the Spring jar into the classpath) as the depicted figure.


Step 2:Create the resource bundle as fallows:


for Japanese


Step 3: Create Spring.xml provided with the messageSource bean other the than already configured bean.

<?xml version="1.0" encoding="UTF-8"?>
<beans xmlns="http://www.springframework.org/schema/beans"
 xmlns:xsi="http://www.w3.org/2001/XMLSchema-instance" xmlns:aop="http://www.springframework.org/schema/aop"
 xmlns:context="http://www.springframework.org/schema/context"
 xsi:schemaLocation="http://www.springframework.org/schema/beans http://www.springframework.org/schema/beans/spring-beans-2.0.xsd
    http://www.springframework.org/schema/aop http://www.springframework.org/schema/aop/spring-aop-2.5.xsd
    http://www.springframework.org/schema/context http://www.springframework.org/schema/context/spring-context-2.5.xsd">

 <bean id="mp3ply" class="com.rajkrrsinghblogspot.Mp3Player">
  <property name="rockSongs">
   <list>
    <value>Rock Song1</value>
    <value>Rock Song2</value>
    <value>Rock Song3</value>
   </list>
  </property>
  
  <property name="jazzSongs">
   <set>
    <value>Rock Song1</value>
    <value>Rock Song2</value>
    <value>Rock Song1</value>
   </set>
  </property>
  
  <property name="classicSongs">
   <map>
    <entry key="1" value="Classic Song1"/>
    <entry key="2" value="Classic Song2"/>
   </map>
  </property>
 </bean>

 <bean id="messageSource" class="org.springframework.context.support.ResourceBundleMessageSource">
  <property name="basenames">
   <list>
    <value>ResourceBundle</value>
   </list>
  </property>
 </bean>

 <context:component-scan base-package="com.rajkrrsinghblogspot" />
</beans>


Step 4: Now Create Mp3Player bean specified in the spring.xml as fallows

package com.rajkrrsinghblogspot;

import java.util.List;
import java.util.Locale;
import java.util.Map;
import java.util.Set;

import org.springframework.beans.factory.annotation.Autowired;
import org.springframework.context.MessageSource;

public class Mp3Player {
 
 private List rockSongs;
 private Set jazzSongs;
 private Map classicSongs;
 
 @Autowired
 private MessageSource messageSource;
 
 public MessageSource getMessageSource() {
  return messageSource;
 }
 public void setMessageSource(MessageSource messageSource) {
  this.messageSource = messageSource;
 }
 public List getRockSongs() {
  System.out.println("Rock Song List :"+rockSongs);
  return rockSongs;
 }
 public void setRockSongs(List rockSongs) {
  this.rockSongs = rockSongs;
 }
 public Set getJazzSongs() {
  System.out.println("I don't understand Japanese is :"+this.getMessageSource().getMessage("idontunderstand.japanese", null,"Default Message",Locale.JAPANESE));
  System.out.println(this.getMessageSource().getMessage("jazzSongSet.value", new Object[]{jazzSongs}, "default jazz songs", Locale.SIMPLIFIED_CHINESE));
  return jazzSongs;
 }
 public void setJazzSongs(Set jazzSongs) {
  this.jazzSongs = jazzSongs;
 }
 public Map getClassicSongs() {
  System.out.println("Classic Song Map:"+classicSongs);
  return classicSongs;
 }
 public void setClassicSongs(Map classicSongs) {
  this.classicSongs = classicSongs;
 }


}

Step 5: Now Create your Test Class to test the desired functionality

package com.rajkrrsinghblogspot;

import java.util.Locale;

import org.springframework.beans.factory.BeanFactory;
import org.springframework.beans.factory.xml.XmlBeanFactory;
import org.springframework.context.ApplicationContext;
import org.springframework.context.support.ClassPathXmlApplicationContext;
import org.springframework.core.io.FileSystemResource;

public class Main {
 
 public static void main(String[] args) {
  //BeanFactory factory = new XmlBeanFactory(new FileSystemResource("spring.xml"));
  ApplicationContext ctx = new ClassPathXmlApplicationContext("spring.xml");
  Mp3Player mp3p = (Mp3Player) ctx.getBean("mp3ply");
  mp3p.getRockSongs();
  mp3p.getJazzSongs();
  mp3p.getClassicSongs();
  String nameInJapanese = ctx.getMessage("name.jp", null, "Default Name", Locale.JAPANESE);
  String nameInEnglish = ctx.getMessage("name", null, "Default Name", Locale.ENGLISH);
  System.out.println("The Name of the user in Japanese is  "+nameInJapanese);
  System.out.println("The Name of the user in English is "+nameInEnglish);
  
 }

}

Step 6: Now Run your program as java application and look at the console


Saturday, October 20, 2012

Build a RESTful Web service with Java

Representational state transfer (REST) is a architectural style of designing loosely coupled applications based on web-standards and the HTTP protocol. It relies on a stateless, client-server, cacheable communications protocol -- and in virtually all cases, the HTTP protocol is used.The hardest part of building a RESTful application is deciding on the resources you want to expose. Once you've done that, using the open source Restlet framework makes building RESTful Web services a snap. This tutorial guides you step-by-step through the fundamental concepts of REST and building applications with Restlets.

Step 1: Create a dynamic web project in Eclipse and add the jars shown in the figure in the lib folder under the WEB-INF


Step 2: Add the Restful nature in the the project using fallowing entry in the web.xml

<?xml version="1.0" encoding="UTF-8"?>
<web-app xmlns:xsi="http://www.w3.org/2001/XMLSchema-instance" xmlns="http://java.sun.com/xml/ns/javaee" xmlns:web="http://java.sun.com/xml/ns/javaee/web-app_2_5.xsd" xsi:schemaLocation="http://java.sun.com/xml/ns/javaee http://java.sun.com/xml/ns/javaee/web-app_2_5.xsd" id="WebApp_ID" version="2.5">
  <display-name>FirstProject</display-name>
  <welcome-file-list>
    <welcome-file>index.html</welcome-file>
    <welcome-file>index.htm</welcome-file>
    <welcome-file>index.jsp</welcome-file>
    <welcome-file>default.html</welcome-file>
    <welcome-file>default.htm</welcome-file>
    <welcome-file>default.jsp</welcome-file>
  </welcome-file-list>
  <servlet>
  <servlet-name>ServletAdaptor</servlet-name>
  <servlet-class>
   com.sun.jersey.server.impl.container.servlet.ServletAdaptor</servlet-class>
  <load-on-startup>1</load-on-startup>
 </servlet>
 <servlet-mapping>
  <servlet-name>ServletAdaptor</servlet-name>
  <url-pattern>/REST/*</url-pattern>
 </servlet-mapping>
</web-app>


Step 3:Create the Employee class as fallows and annotted it with the @Path,@Produce and @Get annotations
package com.rajkrrsingh.blogspot;


import javax.ws.rs.GET;
import javax.ws.rs.Path;
import javax.ws.rs.Produces;
import javax.ws.rs.core.MediaType;

@Path("/employee")
public class Employee {
 
 @GET
 @Produces(MediaType.TEXT_HTML)
 public String getEmployee(){
  return "<html> " + "<title>" + "Employee Details" + "</title>"
          + "<body><h1>" + "Employee Name is Dummy Employee" + "</body></h1>" + "</html> ";
 }

}

Step 4: now run the dynamic web application on the tomcat server and access the fallowing URL


http://localhost:8080/RESTfulProject/REST/employee


Here is the browser output


Step 5:you can use jersy api or Apache HttpClient api to the test the webservice by creating a client,here I have created the client using the jersy api

package com.rajkrrsingh.blogspot.client;

import java.net.URI;

import javax.ws.rs.core.MediaType;
import javax.ws.rs.core.UriBuilder;

import com.sun.jersey.api.client.Client;
import com.sun.jersey.api.client.WebResource;
import com.sun.jersey.api.client.config.ClientConfig;
import com.sun.jersey.api.client.config.DefaultClientConfig;

public class Main {
 
 public static void main(String[] args) {
  ClientConfig config = new DefaultClientConfig();
     Client client = Client.create(config);
     WebResource service = client.resource(getBaseURI());
     System.out.println(service.path("REST").path("employee").accept(MediaType.TEXT_HTML).get(String.class));
  
 }
 
 private static URI getBaseURI() {
     return UriBuilder.fromUri("http://localhost:8080/RESTfulProject").build();
   }


}

After running this main class as a java application you will find the fallowing output on the console

<html> <title>Employee Details</title><body><h1>Employee Name is Dummy Employee</body></h1></html>

Sunday, October 14, 2012

Spring AOP Tutorial

Here I am going you to demonstrate a Spring AOP with the help of AspectJ,for that you need to create a java project in Eclipse and add the spring library apart from spring jar we need to have aspect jars in my class path for that reason I have created a AspectJ library and included the jars in the lib as shown in the figure.


Step 2: Create Model class Mp3Player Class and the Tuner class as created here

package com.rajkrrsinghblogspot.model;

public class Mp3Player {
 
 private String mp3PlayerName;

 public String getMp3PlayerName() {
  return mp3PlayerName;
 }

 public void setMp3PlayerName(String mp3PlayerName) {
  this.mp3PlayerName = mp3PlayerName;
 }

}


Tuner.java

package com.rajkrrsinghblogspot.model;

public class Tuner {
 
 private String tunerName;

 public String getTunerName() {
  return tunerName;
 }

 public void setTunerName(String tunerName) {
  this.tunerName = tunerName;
 }

}


Step 2: Create the MusicService class as fallows:
package com.rajkrrsingh.blogspot.service;

import com.rajkrrsinghblogspot.model.Mp3Player;
import com.rajkrrsinghblogspot.model.Tuner;


public class MusicService {
 
 private Mp3Player mp3Player;
 private Tuner myTuner;
 
 public Mp3Player getMp3Player() {
  return mp3Player;
 }
 public void setMp3Player(Mp3Player mp3Player) {
  this.mp3Player = mp3Player;
 }
 public Tuner getMyTuner() {
  return myTuner;
 }
 public void setMyTuner(Tuner myTuner) {
  this.myTuner = myTuner;
 }
 
 
}


Step 3:Now create Aspect which are the focal point of the tutorial,in my case I am going to create a logging aspect as fallows in which I used annotation @Aspect to know the application that I am writing this class as Aspect,the @Before and @After annotation are used with my advice loggingAdvice and anothetLoggingAdvice these advice will run when the getMp3PlayerName() method will execute.look at the configuration that are self explanatory as well
package com.rajkrrsinghblogspot.aspect;
 
 import org.aspectj.lang.annotation.After;
 import org.aspectj.lang.annotation.Aspect;
 import org.aspectj.lang.annotation.Before;
 
 @Aspect
 public class MyLoggingAspect {
  
  @Before("execution(public String getMp3PlayerName())")
  public void loggingAdvice(){
   System.out.println("Advice : Before the extecution of the getMp3PlayerName Method");
  }
  
  @After("execution(public String getMp3PlayerName())")
  public void anothetLoggingAdvice(){
   System.out.println("Advice : After the extecution of the getMp3PlayerName Method");
  }
 
 }


Step 4: Create spring.xml in the src folder to configure all the beans in the application as shown
<?xml version="1.0" encoding="UTF-8"?>
<beans xmlns="http://www.springframework.org/schema/beans"
 xmlns:xsi="http://www.w3.org/2001/XMLSchema-instance"
 xmlns:aop="http://www.springframework.org/schema/aop"
 xsi:schemaLocation="http://www.springframework.org/schema/aop http://www.springframework.org/schema/aop/spring-aop.xsd
  http://www.springframework.org/schema/beans http://www.springframework.org/schema/beans/spring-beans.xsd
  http://www.springframework.org/schema/context http://www.springframework.org/schema/context/spring-context.xsd"
 xmlns:context="http://www.springframework.org/schema/context">

 <aop:aspectj-autoproxy/>
 
 <bean id="mp3ply" class="com.rajkrrsinghblogspot.model.Mp3Player">
  <property name="mp3PlayerName" value="Sony Mp3Player"/>
 </bean>
 
 <bean id="tuner" class="com.rajkrrsinghblogspot.model.Tuner">
  <property name="tunerName" value="Philipse"/>
 </bean>
 
 <bean id="musicService" class="com.rajkrrsingh.blogspot.service.MusicService" >
  <property name="mp3Player" ref="mp3ply"/>
  <property name="myTuner" ref="tuner"/>
 </bean>

 <bean id="myLogginAspect" class="com.rajkrrsinghblogspot.aspect.MyLoggingAspect" />
</beans>


Step 5: Now create Main class to test this out
package com.rajkrrsinghblogspot.test;

import org.springframework.context.ApplicationContext;
import org.springframework.context.support.ClassPathXmlApplicationContext;

import com.rajkrrsingh.blogspot.service.MusicService;

public class Main {

 /**
  * @param args
  */
 public static void main(String[] args) {
  //BeanFactory factory = new XmlBeanFactory(new FileSystemResource("spring.xml"));
  
  ApplicationContext ctx = new ClassPathXmlApplicationContext("spring.xml");
  MusicService ms = (MusicService) ctx.getBean("musicService");
  System.out.println(ms.getMp3Player().getMp3PlayerName());

 }

}


Step 6: we are all set now,run the main class:


Wednesday, August 22, 2012

JAXB Tutorial with Eclipse

Java Architecture for XML Binding:


Create JAXB Project in Eclipse as Shown in the image


Copy some .xsd file to your Jaxb Project as shown


Create Java Classes from the Scema look into the figures


Click on Finish After Providing the package name


The Fallowing Classes are Populated after finish


Create your main Class As Fallows


Now Run Your Main Class as Java Project


After running the project you will find the xml named as status.xml in the project


Tuesday, August 14, 2012

AJAX JQuery Tutorial

Step 1: Configure your dynamic web project,start with web.xml

<?xml version="1.0" encoding="UTF-8"?>
<web-app xmlns:xsi="http://www.w3.org/2001/XMLSchema-instance" xmlns="http://java.sun.com/xml/ns/javaee" xmlns:web="http://java.sun.com/xml/ns/javaee/web-app_2_5.xsd" xsi:schemaLocation="http://java.sun.com/xml/ns/javaee http://java.sun.com/xml/ns/javaee/web-app_3_0.xsd" id="WebApp_ID" version="3.0">
<display-name>CMIS_NEW</display-name>
<welcome-file-list>
<welcome-file>index.jsp</welcome-file>
</welcome-file-list>

<servlet>
<servlet-name>LanguageServlet</servlet-name>
<servlet-class>com.cims.LanguageServlet</servlet-class>
</servlet>

<servlet-mapping>
<servlet-name>LanguageServlet</servlet-name>
<url-pattern>/LanguageServlet</url-pattern>
</servlet-mapping>


</web-app>

Step 2: create your index.jsp which have jquery script as shown

<%@ page language="java" contentType="text/html; charset=ISO-8859-1"
pageEncoding="ISO-8859-1"%>
<!DOCTYPE html PUBLIC "-//W3C//DTD HTML 4.01 Transitional//EN" "http://www.w3.org/TR/html4/loose.dtd">
<html>
<head>
<meta http-equiv="Content-Type" content="text/html; charset=ISO-8859-1">
<title>AJAX JQUERY EXAMPLE</title>
</head>
<body>
<script type="text/javascript" src="http://ajax.googleapis.com/ajax/libs/jquery/1.2.6/jquery.min.js">
</script>
<script type="text/javascript">
$(document).ready(function() {
$("#getLanguage").click(function(){
$countryName = document.getElementById("countryName").value;
$.post("LanguageServlet", {countryName:$countryName}, function(languageReturned) {
alert(languageReturned);
$("#language").html(languageReturned);
});
});
});
</script>
<form method="post">
Enter Country :
<input id="countryName" name="countryName" type="text" />
<input id="getLanguage" name="getLanguage" type="button" value="Get Language" />
</form>
<div id="language" class="outputTextArea"></div>
</body>

Step 3: Create your LanguageServlet which got hit when you post the request.

package com.cims;

import java.io.IOException;
import java.io.PrintWriter;

import javax.servlet.ServletException;
import javax.servlet.http.HttpServlet;
import javax.servlet.http.HttpServletRequest;
import javax.servlet.http.HttpServletResponse;

public class LanguageServlet extends HttpServlet {

public void doPost(HttpServletRequest req,HttpServletResponse res) 
throws ServletException,IOException{

PrintWriter out = res.getWriter();
res.setContentType("text/html");
String countryName = req.getParameter("countryName");
String languageReturned = "";
if(countryName.equals("india")){
languageReturned = "Hindi";
}else if(countryName.equalsIgnoreCase("USA")){
languageReturned = "English";
}else if(countryName.equalsIgnoreCase("france")){
languageReturned = "French"; 
}else
languageReturned = "Unknown";
out.println(languageReturned);
out.flush();
out.close();


}

}


Step 4: Look at response on your JSP.


Monday, August 13, 2012

Log4j Tutorial : How to send log messages to different log file (Module wise)

Create your Dynamic Web project as fallows:


web.xml
package com.cims;

import java.io.IOException;
import java.io.PrintWriter;

import javax.servlet.ServletException;
import javax.servlet.http.HttpServlet;
import javax.servlet.http.HttpServletRequest;
import javax.servlet.http.HttpServletResponse;

import org.apache.log4j.Logger;


public class TestLog4jServlet extends HttpServlet {

/**
*
*/
private static final long serialVersionUID = 1L;
static Logger logger = Logger.getLogger(TestLog4jServlet.class);

public void doGet(HttpServletRequest req,HttpServletResponse res)
throws ServletException,IOException{
logger.info("Starting the "+this.getClass().getName()+" doGet() Method");
res.setContentType("text/html");
PrintWriter out = res.getWriter();
out.println("Log4j Debugger Example");
logger.info("Exiting the "+this.getClass().getName()+" doGet() Method");
logger.debug("Debug Logs");
logger.warn("Warn Messages");
logger.error("Error Logs");
logger.fatal("Fatal logs");

}

}


index.jsp
<%@ page language="java" contentType="text/html; charset=ISO-8859-1"
pageEncoding="ISO-8859-1"%>
<!DOCTYPE html PUBLIC "-//W3C//DTD HTML 4.01 Transitional//EN" "http://www.w3.org/TR/html4/loose.dtd">
<html>
<head>
<meta http-equiv="Content-Type" content="text/html; charset=ISO-8859-1">
<title>Log4j MultiAppender Example</title>
</head>
<body>
<a href="test"> Test MultiAppender</a>
</body>
</html>


<?xml version="1.0" encoding="UTF-8" ?>
<!DOCTYPE log4j:configuration SYSTEM "log4j.dtd">
<log4j:configuration xmlns:log4j='http://jakarta.apache.org/log4j/'>

<appender name="Test2Servlet" class="org.apache.log4j.DailyRollingFileAppender">
<param name="File" value="D:/Test2Servlet.log" />
<param name="Append" value="false" />
<layout class="org.apache.log4j.PatternLayout">
<param name="ConversionPattern" value="%-4r [%t] %-5p %c %x - %m%n" />
</layout>
</appender>

<appender name="TestLog4jServlet" class="org.apache.log4j.DailyRollingFileAppender">
<param name="File" value="D:/TestLog4jServlet.log" />
<param name="Append" value="false" />
<layout class="org.apache.log4j.PatternLayout">
<param name="ConversionPattern" value="%-4r [%t] %-5p %c %x - %m%n" />
</layout>
</appender>

<category name="com.test">
<priority value="info" />
<appender-ref ref="Test2Servlet" />
</category>

<category name="com.cims">
<priority value="ERROR" />
<appender-ref ref="TestLog4jServlet" />
</category>

<root>
<level value="DEBUG" />

</root>

</log4j:configuration>


Log4JServlet
package com.cims;

import javax.servlet.ServletException;
import javax.servlet.http.HttpServlet;

import org.apache.log4j.PropertyConfigurator;
import org.apache.log4j.xml.DOMConfigurator;

public class Log4JServlet extends HttpServlet {

public void init() throws ServletException{

String log4jfile = getInitParameter("log4j-init-file");
if(log4jfile != null){
String propfile = getServletContext().getRealPath(log4jfile);
//PropertyConfigurator.configure(propfile);
DOMConfigurator.configure(propfile);
}

}

}


com.test.Test2Servlet
package com.test;

import java.io.IOException;
import java.io.PrintWriter;

import javax.servlet.ServletException;
import javax.servlet.http.HttpServlet;
import javax.servlet.http.HttpServletRequest;
import javax.servlet.http.HttpServletResponse;

import org.apache.log4j.Logger;

public class Test2Servlet extends HttpServlet{

/**
* 
*/
private static final long serialVersionUID = 1L;
static Logger logger = Logger.getLogger(Test2Servlet.class);


public void doGet(HttpServletRequest req,HttpServletResponse res)
throws ServletException,IOException{

res.setContentType("text/html");
PrintWriter out = res.getWriter();
out.println("inside the "+this.getClass().getName());
logger.info("Starting "+this.getClass().getName()+".doGet() method");
logger.debug("Debug logs");
logger.warn("warn log");
logger.error("Error logs");
logger.fatal("fatal logs");
logger.info("Exiting "+this.getClass().getName()+".doGet() method");
}


}


com.cims.TestLog4jServlet
package com.cims;

import java.io.IOException;
import java.io.PrintWriter;

import javax.servlet.RequestDispatcher;
import javax.servlet.ServletException;
import javax.servlet.http.HttpServlet;
import javax.servlet.http.HttpServletRequest;
import javax.servlet.http.HttpServletResponse;

import org.apache.log4j.Logger;


public class TestLog4jServlet extends HttpServlet {

/**
*
*/
private static final long serialVersionUID = 1L;
static Logger logger = Logger.getLogger(TestLog4jServlet.class);

public void doGet(HttpServletRequest req,HttpServletResponse res)
throws ServletException,IOException{
logger.info("Starting the "+this.getClass().getName()+" doGet() Method");
res.setContentType("text/html");
PrintWriter out = res.getWriter();
out.println("Log4j Debugger Example");
logger.info("Exiting the "+this.getClass().getName()+" doGet() Method");
logger.debug("Debug Logs");
logger.warn("Warn Messages");
logger.error("Error Logs");
logger.fatal("Fatal logs");
RequestDispatcher rd = getServletContext().getRequestDispatcher("/test2");
rd.forward(req, res);

}

}

Output


Log4j Tutorial : How to Create Multiple Appenders

Step 1: Create a dynamic web application in eclipse
Step 2: Create web.xml file as fallows:

<?xml version="1.0" encoding="UTF-8"?>
<web-app xmlns:xsi="http://www.w3.org/2001/XMLSchema-instance" xmlns="http://java.sun.com/xml/ns/javaee" xmlns:web="http://java.sun.com/xml/ns/javaee/web-app_2_5.xsd" xsi:schemaLocation="http://java.sun.com/xml/ns/javaee http://java.sun.com/xml/ns/javaee/web-app_3_0.xsd" id="WebApp_ID" version="3.0">
<display-name>CMIS_NEW</display-name>
<welcome-file-list>
<welcome-file>index.jsp</welcome-file>
</welcome-file-list>

<servlet>
<servlet-name>TestLog4j</servlet-name>
<servlet-class>com.cims.TestLog4jServlet</servlet-class>
</servlet>

<servlet-mapping>
<servlet-name>TestLog4j</servlet-name>
<url-pattern>/test</url-pattern>
</servlet-mapping>


</web-app>

Step 3 :Create Servlet to initialize the Log4j properties through xml file

package com.cims;

import javax.servlet.ServletException;
import javax.servlet.http.HttpServlet;

import org.apache.log4j.PropertyConfigurator;
import org.apache.log4j.xml.DOMConfigurator;

public class Log4JServlet extends HttpServlet {

public void init() throws ServletException{

String log4jfile = getInitParameter("log4j-init-file");
if(log4jfile != null){
String propfile = getServletContext().getRealPath(log4jfile);
//PropertyConfigurator.configure(propfile);
DOMConfigurator.configure(propfile);
}

}

}

Step 4: Create your Log4j configuratioin xml and place into the classpath

package com.cims;<br/> <br/>import javax.servlet.ServletException;<br/>import javax.servlet.http.HttpServlet;<br/> <br/>import org.apache.log4j.PropertyConfigurator;<br/>import org.apache.log4j.xml.DOMConfigurator;<br/> <br/>public class Log4JServlet extends HttpServlet {<br/>  <br/> public void init() throws ServletException{<br/>   <br/>  String log4jfile = getInitParameter(&quot;log4j-init-file&quot;);<br/>  if(log4jfile != null){<br/>   String propfile = getServletContext().getRealPath(log4jfile);<br/>   //PropertyConfigurator.configure(propfile);<br/>   DOMConfigurator.configure(propfile);<br/>  }<br/>   <br/> }<br/> <br/>}

Step 5:Now create a servlet to test the configuration

package com.cims;

import java.io.IOException;
import java.io.PrintWriter;

import javax.servlet.ServletException;
import javax.servlet.http.HttpServlet;
import javax.servlet.http.HttpServletRequest;
import javax.servlet.http.HttpServletResponse;

import org.apache.log4j.Logger;


public class TestLog4jServlet extends HttpServlet {

/**
*
*/
private static final long serialVersionUID = 1L;
static Logger logger = Logger.getLogger(TestLog4jServlet.class);

public void doGet(HttpServletRequest req,HttpServletResponse res)
throws ServletException,IOException{
logger.info("Starting the "+this.getClass().getName()+" doGet() Method");
res.setContentType("text/html");
PrintWriter out = res.getWriter();
out.println("Log4j Debugger Example");
logger.info("Exiting the "+this.getClass().getName()+" doGet() Method");
logger.debug("Debug Logs");
logger.warn("Warn Messages");
logger.error("Error Logs");
logger.fatal("Fatal logs");

}

}

Here is the output at console


Sunday, August 12, 2012

Log4j Tutorial : Configure Log4j In a web application

Step 1: create your web application in eclipse
Step 2: Create web.xml as fallows

<?xml version="1.0" encoding="UTF-8"?>
<web-app xmlns:xsi="http://www.w3.org/2001/XMLSchema-instance" xmlns="http://java.sun.com/xml/ns/javaee" xmlns:web="http://java.sun.com/xml/ns/javaee/web-app_2_5.xsd" xsi:schemaLocation="http://java.sun.com/xml/ns/javaee http://java.sun.com/xml/ns/javaee/web-app_3_0.xsd" id="WebApp_ID" version="3.0">
  <display-name>CMIS_NEW</display-name>
  <welcome-file-list>
    <welcome-file>index.jsp</welcome-file>
  </welcome-file-list>
   
   
  <context-param>
  <param-name>log4jConfigLocation</param-name>
  <param-value>/WEB-INF/log4j.properties</param-value>
 </context-param>
  
  <servlet>
  <servlet-name>TestLog4j</servlet-name>
  <servlet-class>com.cims.TestLog4jServlet</servlet-class>
  </servlet>
  
  <servlet-mapping>
   <servlet-name>TestLog4j</servlet-name>
   <url-pattern>/test</url-pattern>
  </servlet-mapping>


</web-app>

Step 3: Create servlet which initialized your log4j configuration
package com.cims;

import javax.servlet.ServletException;
import javax.servlet.http.HttpServlet;

import org.apache.log4j.PropertyConfigurator;

public class Log4JServlet extends HttpServlet {
 
 public void init() throws ServletException{
  
  String log4jfile = getInitParameter("log4j-init-file");
  if(log4jfile != null){
   String propfile = getServletContext().getRealPath(log4jfile);
   PropertyConfigurator.configure(propfile);
  }
  
 }

}

Step 4: Create log4j.properties and place into the classpath
log4j.rootLogger=INFO, CMISAppender
log4j.appender.CMISAppender=org.apache.log4j.ConsoleAppender
log4j.appender.CMISAppender.layout=org.apache.log4j.PatternLayout
log4j.appender.CMISAppender.layout.ConversionPattern=%-4r [%t] %-5p %d %c %x - %m%n

Step 5: Create your tester servlet as fallows
package com.cims;

import java.io.IOException;
import java.io.PrintWriter;

import javax.servlet.ServletException;
import javax.servlet.http.HttpServlet;
import javax.servlet.http.HttpServletRequest;
import javax.servlet.http.HttpServletResponse;

import org.apache.log4j.Logger;


public class TestLog4jServlet extends HttpServlet {
 
 /**
  * 
  */
 private static final long serialVersionUID = 1L;
 static Logger logger = Logger.getLogger(TestLog4jServlet.class);
 
 public void doGet(HttpServletRequest req,HttpServletResponse res) 
   throws ServletException,IOException{
  logger.info("Starting the "+this.getClass().getName()+" doGet() Method");
  res.setContentType("text/html");
  PrintWriter out = res.getWriter();
  out.println("Log4j Debugger Example");
  logger.info("Exiting the "+this.getClass().getName()+" doGet() Method");
  
 }

}


Tuesday, August 7, 2012

Quartz Tutorial : Configure Quartz in web Application

This Tutorial will guide you how to configure Quartz Scheduler in J2EE web Application.
To introduce quartz into the web application we need to specify a context listener into the web application which notify the event of context start up as well as shut down to start and stop the quartz scheduler.
Look in the fallowing example to plug qartz in to the web appliction

Step 1: Create the dynamic web application into the eclipse
Step 2: add the fallowing entries inside web.xml

<?xml version="1.0" encoding="UTF-8"?>
<web-app xmlns:xsi="http://www.w3.org/2001/XMLSchema-instance" xmlns="http://java.sun.com/xml/ns/javaee" xmlns:web="http://java.sun.com/xml/ns/javaee/web-app_2_5.xsd" xsi:schemaLocation="http://java.sun.com/xml/ns/javaee http://java.sun.com/xml/ns/javaee/web-app_2_5.xsd" id="WebApp_ID" version="2.5">
<display-name>TestQuartzApi</display-name>
<welcome-file-list>
<welcome-file>index.html</welcome-file>
</welcome-file-list>
<listener>
<listener-class>com.test.QuartzInitializerListener</listener-class>
</listener>
</web-app>

Step 3: Create your Job which implements Quartz's Job as fallows

package com.test;

import org.quartz.Job;
import org.quartz.JobExecutionContext;
import org.quartz.JobExecutionException;

public class MyJob implements Job {

@Override
public void execute(JobExecutionContext ctx) throws JobExecutionException {
System.out.println("Quartz is executing my Job");
}

}

Step4 : Create your QuartzInitializerListener class which implements ServletContextListner and override the contextInitialized method,in the contextInitialized method we are providing the configuration regarding Scheduler and Trigger as fallows

package com.test;

import javax.servlet.ServletContextEvent;
import javax.servlet.ServletContextListener;
import org.quartz.CronTrigger;
import org.quartz.JobDetail;
import org.quartz.Scheduler;
import org.quartz.SchedulerFactory;
import org.quartz.impl.StdSchedulerFactory;

public class QuartzInitializerListener implements ServletContextListener {

public void contextDestroyed(ServletContextEvent arg0){}


public void contextInitialized(ServletContextEvent arg0)
{


System.out.println("Starting The Application");
try{
SchedulerFactory schedulerFactory = new StdSchedulerFactory();
Scheduler scheduler = schedulerFactory.getScheduler();

long ctime = System.currentTimeMillis();

JobDetail job = new JobDetail();
job.setName("MyJobName");
job.setJobClass(MyJob.class);

CronTrigger crt = new CronTrigger();
crt.setName("MyTriggerName");
crt.setCronExpression("0/30 * * * * ?");

scheduler.start();
scheduler.scheduleJob(job, crt);

}catch (Exception e) {
System.out.println(e);
}

}
}

Step 5: Make sure to include quartz api related jar in the build path and run your application,here you goes


Monday, August 6, 2012

Quartz Tutorial

Quartz is an open source job scheduling framework that provides simple but powerful mechanisms for job scheduling in Java applications. Quartz allows developers to schedule jobs by time interval or by time of day. It implements many-to-many relationships for jobs and triggers and can associate multiple jobs with different triggers.

Here I am providing a simple guide to Quartz API with the help of fallowing example

Step 1: Create a Simple java Application in eclipse.

Step 2: Add the fallowing jars to the classpath
quartz-1.6.0.jar
commons-collections-3.2.jar
commons-logging-1.1.1.jar
jta-1.1.jar


Step 3:Create your job which implements Job interface
package com.test;

import org.quartz.Job;
import org.quartz.JobExecutionContext;
import org.quartz.JobExecutionException;

public class MyJob implements Job {

@Override
public void execute(JobExecutionContext ctx) throws JobExecutionException {
System.out.println("Quartz is executing my Job");
}

}

Step 4: Create Your Schedular and test application
package com.test;

import java.text.ParseException;

import org.quartz.CronTrigger;
import org.quartz.JobDetail;
import org.quartz.Scheduler;
import org.quartz.SchedulerException;
import org.quartz.impl.StdSchedulerFactory;

public class JobSchedular {
public static void main(String[] args) throws ParseException, SchedulerException {
JobDetail job = new JobDetail();
job.setName("MyJobName");
job.setJobClass(MyJob.class);

CronTrigger crt = new CronTrigger();
crt.setName("MyTriggerName");
crt.setCronExpression("0/30 * * * * ");

Scheduler scheduler = new StdSchedulerFactory().getScheduler();
scheduler.start();
scheduler.scheduleJob(job, crt);
}

}

Step 5: Here is the outcome


Wednesday, July 4, 2012

AJAX : GET/POST FORM Submit with Drop Down Menu


Lets start from view:
Drop Down Menu In your JSP/HTML

<select id = "Language" onchange="javascript:AjaxEx.sendAjaxRequest();">

<option value ='en'>EN</option>

<option value ='fr'>FR</option>

</select> 


AJAX code that reqired to be include in the view
(function() {
 AjaxEx = {
  init: function(url, elId) {
   if (!url || !elId) {
    alert("Invalid input!");
    return;
   }
   this.url = url;
   var el = document.getElementById(elId);
   if (!el) {
    alert("Container Element, to place Ajax response doesn't exists!");
    return;
   }
   this.el = el;
   this.sampleHtml = "

This will be replaced with AJAX response!

"; // create xml http request object for AJAX requests this.xmlHttp = this.initXmlHttp(); }, // End of init() initXmlHttp : function () { if (window.XMLHttpRequest) // Firefox, Opera, IE7, etc. return new XMLHttpRequest(); if (window.ActiveXObject) // IE6, IE5 return new ActiveXObject("Microsoft.XMLHTTP"); }, // End of initXmlHttp() resetContent : function () { this.el.innerHTML = this.sampleHtml; }, // End of resetContent() sendAjaxRequest : function () { // initialize XML Http object if not available if (!this.xmlHttp) this.xmlHttp = this.initXmlHttp(); if (this.xmlHttp) { var ajaxObj = this; this.xmlHttp.onreadystatechange = function() { if (ajaxObj.xmlHttp.readyState==4 && ajaxObj.xmlHttp.status==200) { // 4 = "loaded", 200 = "OK" ajaxObj.el.innerHTML = ajaxObj.xmlHttp.responseText; } }; var selBox = document.getElementById("Language"); // prepare parameters var langSalect = selBox.options[selBox.selectedIndex].value; if (langSalect == "") { alert("Please select language!"); return; } var params = "langSalect=" + langSalect; // for multiple parameters separate them by '&' as given below // var params = "empCode=E1001&dept=TestDept" this.makePOSTRequest(params); // this.makeGETRequest(params); } else alert("Your browser does not support AJAX."); }, // End of sendAjaxRequest() makePOSTRequest : function (params) { this.xmlHttp.open("POST", this.url, true); //Send the proper header information along with the request this.xmlHttp.setRequestHeader("Content-type", "application/x-www-form-urlencoded"); this.xmlHttp.setRequestHeader("Content-length", params.length); this.xmlHttp.setRequestHeader("Connection", "close"); this.xmlHttp.send(params); }, // End of makePOSTRequest() makeGETRequest : function (params) { this.xmlHttp.open("GET", this.url + "?" + params, true); this.xmlHttp.send(null); } // End of makeGETRequest() } // End of AjaxEx })();

Create Your AJAX content object as fallows for submission of the perticular url and the tag id whose content need to be set Asynchronously

<script type="text/javascript">

<var url = "...../DBServlet">

<var ajaxObj = document.getElementById('.....')>

<AjaxEx.init(url, "ajaxObj">

</script>


Sunday, July 1, 2012

Apache Lucene : A Smart Guide to Index and Search Text

Apache Lucene(TM) is a high-performance, full-featured text search engine library written entirely in Java. It is a technology suitable for nearly any application that requires full-text search, especially cross-platform.
For adding customized full text search,Lucene is powerful efficient search algo
lets begin to explore it,The Example below is very self explanatory

Step 1: Create java project in eclipse add lucene core jar into the build path of
the project.

Step 2: Create a class LuceneIndexnSearch as shown below
package com.test;

import java.io.File;
import java.io.FileReader;
import java.io.IOException;
import java.io.Reader;
import org.apache.lucene.analysis.Analyzer;
import org.apache.lucene.analysis.standard.StandardAnalyzer;
import org.apache.lucene.document.Document;
import org.apache.lucene.document.Field;
import org.apache.lucene.index.CorruptIndexException;
import org.apache.lucene.index.IndexReader;
import org.apache.lucene.index.IndexWriter;
import org.apache.lucene.queryParser.ParseException;
import org.apache.lucene.queryParser.QueryParser;
import org.apache.lucene.search.IndexSearcher;
import org.apache.lucene.search.Query;
import org.apache.lucene.search.ScoreDoc;
import org.apache.lucene.search.TopDocCollector;
import org.apache.lucene.store.Directory;
import org.apache.lucene.store.FSDirectory;
import org.apache.lucene.store.LockObtainFailedException;

@SuppressWarnings("deprecation")
public class LuceneIndexnSearch {

 public static final String SOURCE_FILE = "sourceFileToIndex";
 public static final String INDEX_DIR = "indexDir";

 public static final String FIELD_PATH = "path";
 public static final String FIELD_CONTENTS = "contents";


 public  void createIndex() throws CorruptIndexException, LockObtainFailedException, IOException {
  Analyzer analyzer = new StandardAnalyzer();
  boolean recreateIndexIfExists = true;
  IndexWriter indexWriter = new IndexWriter(INDEX_DIR, analyzer, recreateIndexIfExists);
  File dir = new File(SOURCE_FILE);
  File[] files = dir.listFiles();
  for (File file : files) {
   Document document = new Document();

   String path = file.getCanonicalPath();
   document.add(new Field(FIELD_PATH, path, Field.Store.YES, Field.Index.UN_TOKENIZED));

   Reader reader = new FileReader(file);
   document.add(new Field(FIELD_CONTENTS, reader));

   indexWriter.addDocument(document);
  }
  indexWriter.optimize();
  indexWriter.close();
 }

 public static void searchIndex(String searchString) throws IOException, ParseException {
  System.out.println("Searching for '" + searchString + "'");
  Directory directory = FSDirectory.getDirectory(INDEX_DIR);
  IndexReader indexReader = IndexReader.open(directory);
  IndexSearcher indexSearcher = new IndexSearcher(indexReader);

  Analyzer analyzer = new StandardAnalyzer();
  QueryParser queryParser = new QueryParser(FIELD_CONTENTS, analyzer);
  Query query = queryParser.parse(searchString);
  TopDocCollector collector = new TopDocCollector(5); 

  indexSearcher.search(query, collector); 

  int numTotalHits = collector.getTotalHits(); 

  collector = new TopDocCollector(numTotalHits); 

  indexSearcher.search(query, collector); 

  ScoreDoc[] hits = collector.topDocs().scoreDocs; 
  
  for(ScoreDoc sd : hits){
   int docId = sd.doc;
   Document document = indexSearcher.doc(docId);
   System.out.println("Number of matches(Hits) in the document "+document.get(FIELD_PATH)+" of the given string "+searchString+" is "+sd.doc);
  }
 }

}
Step 3: create to folder to contain files to index and to contain the indexed document:
In the source folder I have copied the to documents(text files) vehicleOwnedByABC.txt the content of the file is as:

Maruti
mahindra
vento
honda city
honda accord
hyundai


The other file name is vehicleOwnedByDEF.txt with content

swaraj
renault
polo
nissan
maruti
hyundai


Step 4: Create your main class to test the searching and indexing as fallows
package com.test;

public class Main {
 public static void main(String[] args) {
  LuceneIndexnSearch lins = new LuceneIndexnSearch();
  try{
  lins.createIndex();
  lins.searchIndex("Hyundai");
  lins.searchIndex("Maruti");
  lins.searchIndex("Mahindra");
  lins.searchIndex("Honda city");
  lins.searchIndex("Honda accord");
  }catch(Exception e){
   e.printStackTrace();
  }
 }

}

Step 5: Here is the output at console:
Searching for 'Hyundai'
Number of matches(Hits) in the document F:\SpringExamples\LuceneExample\sourceFileToIndex\vehicleOwnedByDEF.txt of the given string Hyundai is 1
Number of matches(Hits) in the document F:\SpringExamples\LuceneExample\sourceFileToIndex\vehicleOwnedByABC.txt of the given string Hyundai is 0
Searching for 'Maruti'
Number of matches(Hits) in the document F:\SpringExamples\LuceneExample\sourceFileToIndex\vehicleOwnedByDEF.txt of the given string Maruti is 1
Number of matches(Hits) in the document F:\SpringExamples\LuceneExample\sourceFileToIndex\vehicleOwnedByABC.txt of the given string Maruti is 0
Searching for 'Mahindra'
Number of matches(Hits) in the document F:\SpringExamples\LuceneExample\sourceFileToIndex\vehicleOwnedByABC.txt of the given string Mahindra is 0
Searching for 'Honda city'
Number of matches(Hits) in the document F:\SpringExamples\LuceneExample\sourceFileToIndex\vehicleOwnedByABC.txt of the given string Honda city is 0
Searching for 'Honda accord'
Number of matches(Hits) in the document F:\SpringExamples\LuceneExample\sourceFileToIndex\vehicleOwnedByABC.txt of the given string Honda accord is 0

Sunday, June 10, 2012

Java Decompiler (Jad) : A Smart guide

Jad is a command line Java decompiler written by Pavel Kouznetsov,written for several plateform.
can be downloaded from
1. http://www.kpdus.com/jad.html
2. http://www.varaneckas.com/jad

Installation is very easy,just extract the downloaded zip .
Set the environment variable path for your plateform here I am using windows.
After setting the path variable open the cmd to check the proper installation type jad on
command prompt,if every thing goes fine you will find the fallowing outupt.


To decompile single java class use the command
jad -sjava MyClass.class

To decompile Multiple java class use the command
jad -o -r -sjava -dsrc bin/**/*.class

Jadclipse plugin for Eclipse
Download the Jadclipse for eclipse from http://sourceforge.net/projects/jadclipse/
Copy the extracted jars in the Eclipse plugin folder.
Restart the Eclipse and set the decompliler path as shown


Now your Eclipse is ready to decompile any java class whose source file is not provided with you,just press
F3 on the name of the class and see the magic.

Ant Build File to decompile all the classes inside the jar

<project name="Decompile_jars" default="main" basedir=".">


<taskdef resource="net/sf/antcontrib/antcontrib.properties"/>


<property name="jad" location="c:/program files/jad1.5.8/jad.exe"/>
<property name="unjar.dir" location="loc_unjar"/>

<target name="main">
    <input
        message="Please enter jar file name"
        addproperty="input.file"
        defaultvalue="source"
    />

    <!-- clean temp dir -->
    <delete dir="${unjar.dir}"/>

    <!-- unpack jar file -->    
    <unjar src="${input.file}.jar" dest="${unjar.dir}"/>

    <!-- decompile all class files -->
    <exec executable="cmd.exe">
        <arg line="/c ${jad} -o -r -sjava -d${unjar.dir} ${unjar.dir}/**/*.class"/>
    </exec>     
     
    <!-- create jar file -->
    <jar destfile="${input.file}_decompile.jar">
        <fileset dir="${unjar.dir}"
            excludes="**/*.class"
        />
    </jar>

    <!-- clean temp dir -->
    <delete dir="${unjar.dir}"/>
    
</target>


</project>

Spring Framework and SL4J Integration

The Simple Logging Facade for Java or (SLF4J) serves as a simple facade or abstraction for various logging frameworks, e.g. java.util.logging, log4j and logback, allowing the end user to plug in the desired logging framework at deployment time.

slf4j is actually not a logging library - it's just a facade. You choose a logging framework by yourself. We use slf4j and logback that implements the slf4j API natively.

The SLF4J project has similar goals to commons-logging. It uses quite a different approach, however, which has both benefits and drawbacks. Future versions of commons-logging may adopt some of the concepts of SLF4J.

Spring uses Jakarta Common Library(JCL) and java.util.logging,SL4J has advantages over JCL as it does not suffer
from class loader problem and Memory Leak Problem.SLFJ for logging in java use parametrized version of various log methods they are faster as compared to normal method.


Lests Demonstrate the Integration of SL4J to String framework,in this example we are using SL4J with logback framework

Step 1: Create Java Project.
Step 2: Add Spring Library,SL4J jars and Logback jars in build path as shown


Step 3: Create a class which includes logger as fallows
package com.main;


import org.slf4j.Logger;
import org.slf4j.LoggerFactory;

public class HelloSl4j {
 
 private static final Logger logger = LoggerFactory.getLogger(HelloSl4j.class);
 
 public void sayHello(){
  logger.info("Inside the sayHello Method");
  System.out.println("Say Hello To Spring SL4J Integration");
 }
}


Step 4: create the spring.xml for your application context as shown


Step 5: create your logger.xml to configure logging as fallows
<?xml version="1.0" encoding="UTF-8" ?>
<configuration>
 
 <appender name="STDOUT"
            class="ch.qos.logback.core.ConsoleAppender">
 
    <!-- encoders are assigned by default the type
         ch.qos.logback.classic.encoder.PatternLayoutEncoder -->
    <encoder>
   <pattern>
    %d{HH:mm:ss.SSS} [%thread] %-5level %logger{36} - %msg%n
   </pattern>
    </encoder>
  </appender>
 
 <root level="INFO">
  <appender-ref ref="STDOUT" />
 </root>
 
</configuration>

Step 6: Create your main class fallows

package com.test;


import org.springframework.context.ApplicationContext;
import org.springframework.context.support.ClassPathXmlApplicationContext;

import com.main.HelloSl4j;

public class HelloSl4jTest {

 public static void main(String[] args) {
  ApplicationContext ctx = new ClassPathXmlApplicationContext("spring.xml");
  HelloSl4j helloSl4j = (HelloSl4j) ctx.getBean("helloSl4j");
  helloSl4j.sayHello();
 }

}


Here is the Logging Console


Saturday, June 9, 2012

Working with Java SE 7 Exception Changes

Working with Java SE 7 Exception Changes

Jelastic : A better Cloud Hosting Solution for Java

Lets try Jelastic Cloud hosting solution which is far better and easier solution than Google App Engine.
The other cloud hosting Solution which are getting popular these days are Cloud Foundry and OpenShift.
i am not going to compare all these hosting solution but try to getting started with Jelastic which
offer a very user friendly UI to setup your application environment.
I am trying to setup my small application on the Jelastic platform its not that tough as I was thinking it
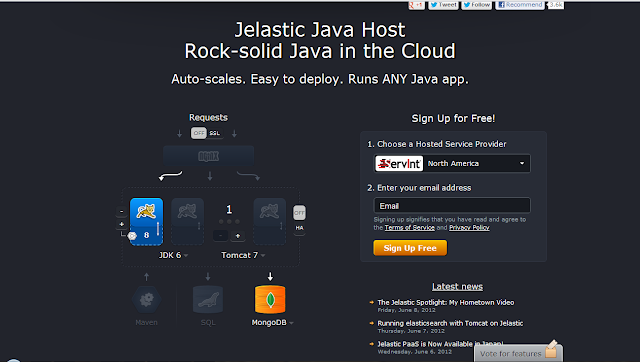
the http://jelastic.com/ home page is self explanatory how you should start from.

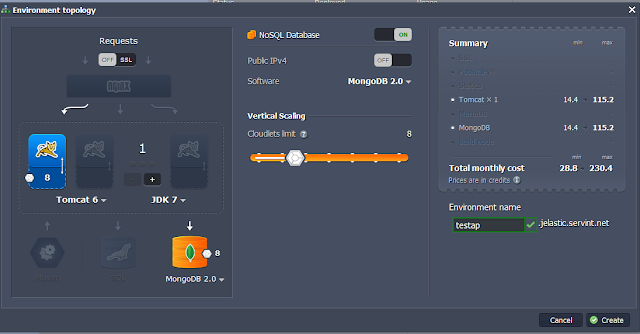
lets setup our application environment by selecting JDK 6,Tomcat 6 and MongoDB as our NoSQL database,choose
your hosting provide and signup for free


Login with the password sent by jelastic to your registered mail address
provide enviornment name and press create


After pressing the create button jelastic takes some time to configure your enviornment and send the MongoDB
node details to your registered mail id open the RockMongo (MongoDB web UI) with the help of provided userid and password.

Setup MongoDB configuration like database name,collection name etc with the help of GUI.


After Deploying the application Test you application on http://testap.jelastic.servint.net/view/index.jsp
And MyApp is up and Running


Spring : Working with JdbcTemplates

Spring provides JDBC Templates to access the data from the database with ease.Spring provides
org.springframework.jdbc.core.JdbcTemplate which basically take cares about all your
connection establishment to the database post query work eg closingh statement and connections.

Merits of spring templates as compared to conventinal Data access through JDBC
1. Connection Handling is done by Spring container you need not to worry about it,by this way
it reduced the singnificant amount of the coding.
2. Exception handling in conventional data access through JDBC is very cumbersome process,
here Spring take care of all these stuff by converting SQLException to the RuntimeException
3.ResultSetExtractor or RowMapper which allows result directl into the Object ResultSetExtractor
or a list of objects RowMapper.

Lets have a walk through how to work with JdbcTemplates

Step 1: Create your database as fallows,Here I am using MySQL as database.


Step 2: Create the Java Project and add Spring framework jar library to it.
Step 3: Create spring.xml as shown


Step 4:
Create Employee Model Class as shown
package com.example.model;

public class Employee {
 
 private int empid;
 private String empName;
 
 public Employee(int empid,String empName){
  this.empid = empid;
  this.empName = empName;
 }
 
 public int getEmpid() {
  return empid;
 }
 public void setEmpid(int empid) {
  this.empid = empid;
 }
 public String getEmpName() {
  return empName;
 }
 public void setEmpName(String empName) {
  this.empName = empName;
 }
 

}

Step 5:Create the Data Access Object as fallows
package com.example.dao;

import java.sql.Connection;
import java.sql.DriverManager;
import java.sql.PreparedStatement;
import java.sql.ResultSet;
import java.sql.SQLException;

import javax.sql.DataSource;

import org.springframework.beans.factory.annotation.Autowired;
import org.springframework.jdbc.core.JdbcTemplate;
import org.springframework.stereotype.Component;

import com.example.model.Employee;
@Component
public class EmpDaoImpl {
 
 @Autowired
 private DataSource dataSource;
 
 public void create(int empid, String employee_name) {
  JdbcTemplate jdbcTemplate = new JdbcTemplate(dataSource);
  jdbcTemplate.update("INSERT INTO EMPLOYEE (empid, EMPLOYEE_NAME) VALUES(?,?)",
    new Object[] { empid, employee_name });
 }
 
 public DataSource getDataSource() {
  return dataSource;
 }

 public void setDataSource(DataSource dataSource) {
  this.dataSource = dataSource;
 }

}

Step 6: Create your main class as fallows to check whether all these things are in right shape.
package com.example;

import org.springframework.context.ApplicationContext;
import org.springframework.context.support.ClassPathXmlApplicationContext;

import com.example.dao.EmpDaoImpl;
import com.example.model.Employee;

public class Main {
 
 public static void main(String[] args) {
  
  ApplicationContext ctx = new ClassPathXmlApplicationContext("spring.xml");
  EmpDaoImpl empdl = ctx.getBean("empDaoImpl",EmpDaoImpl.class);
  
  empdl.create(1, "Sharad Singh");  
  
  System.out.println("Data Inserted In Database");
 }

}

Output @ console:
log4j:WARN No appenders could be found for logger (org.springframework.core.env.StandardEnvironment).
log4j:WARN Please initialize the log4j system properly.
log4j:WARN See http://logging.apache.org/log4j/1.2/faq.html#noconfig for more info.
Data Inserted In Database

Step 7:
Look into the database table whether data has been updated or not,Here you go......


Friday, June 8, 2012

Spring : Working with DataSource and Database Connection Pooling

Getting Database connection through conventional JDBC is very tedious task which include a lot
Exception handling and repeative coding,Spring simplifies the whole process with very ease.
Spring provides the org.springframework.jdbc-3.1.0.RELEASE.jar whic contains the org.springframework.jdbc.datasource.DriverManagerDataSource to get the connection
object to the Database.

For the production environment we can use org.apache.commons.dbcp to implement the connection
pooling,here I summarize how we implement the connection pooling in spring framework.
Step 1: The very first step is to create the Java project and add the Spring Library as fallows


Step 2:Setup the database,in this example i am using MySQL as a database,ensure MySQL database driver jar
should be in the class path.
Step 3:Crate the spring.xml file in source folder as fallows

<?xml version="1.0" encoding="UTF-8"?>
<beans xmlns="http://www.springframework.org/schema/beans"
 xmlns:xsi="http://www.w3.org/2001/XMLSchema-instance"
 xsi:schemaLocation="http://www.springframework.org/schema/beans http://www.springframework.org/schema/beans/spring-beans.xsd
  http://www.springframework.org/schema/context http://www.springframework.org/schema/context/spring-context.xsd"
  xmlns:context="http://www.springframework.org/schema/context">

 <context:annotation-config/>
 <context:component-scan base-package="com.example"/>
 
 <bean id="dataSource" class="org.apache.commons.dbcp.BasicDataSource">
  <property name="driverClassName" value="com.mysql.jdbc.Driver"/>
  <property name="url" value="jdbc:mysql://localhost:3306/HibernateDb"/>
  <property name="username" value="root"/>
  <property name="password" value="root"/>
  <property name="initialSize" value="2"/>
  <property name="maxActive" value="5"/>
 </bean>
 

</beans>

Step 4: Create your Model Class as fallows
package com.example.model;

public class Employee {
 
 private int empid;
 private String empName;
 
 public Employee(int empid,String empName){
  this.empid = empid;
  this.empName = empName;
 }
 
 public int getEmpid() {
  return empid;
 }
 public void setEmpid(int empid) {
  this.empid = empid;
 }
 public String getEmpName() {
  return empName;
 }
 public void setEmpName(String empName) {
  this.empName = empName;
 }
 

}

Step 5: create DataAccessor Object to get the data from database

package com.example.dao;

import java.sql.Connection;
import java.sql.DriverManager;
import java.sql.PreparedStatement;
import java.sql.ResultSet;
import java.sql.SQLException;

import javax.sql.DataSource;

import org.springframework.beans.factory.annotation.Autowired;
import org.springframework.stereotype.Component;

import com.example.model.Employee;
@Component
public class EmpDaoImpl {
 
 @Autowired
 private DataSource dataSource;
 
 public Employee getEmployee(int empid) throws Exception{
  
  Connection conn = null;
  conn = dataSource.getConnection();
  PreparedStatement ps = conn.prepareStatement("select * from employee where empid = ?");
  ps.setInt(1, empid);
  
  Employee emp = null;
  ResultSet rs = ps.executeQuery();
  
  if(rs.next()){
   emp = new Employee(empid, rs.getString("employee_name"));
  }
  rs.close();
  ps.close();
  
  return emp;


 }

 public DataSource getDataSource() {
  return dataSource;
 }

 public void setDataSource(DataSource dataSource) {
  this.dataSource = dataSource;
 }

}

Step 6: Now test your prog by using your Main Class as shown

package com.example;

import org.springframework.context.ApplicationContext;
import org.springframework.context.support.ClassPathXmlApplicationContext;

import com.example.dao.EmpDaoImpl;
import com.example.model.Employee;

public class Main {
 
 public static void main(String[] args) {
  
  ApplicationContext ctx = new ClassPathXmlApplicationContext("spring.xml");
  EmpDaoImpl empdl = ctx.getBean("empDaoImpl",EmpDaoImpl.class);
  
  Employee emp = null;
  try {
   emp = empdl.getEmployee(1);
  } catch (Exception e) {
   // TODO Auto-generated catch block
   e.printStackTrace();
  }
  
  System.out.println(emp.getEmpName());
 }

}
Output


Thursday, June 7, 2012

Convert JSON to DBObject

Conversion of JSON to DBObject need JSON parsing only here I attach the simple
code to understand it.
package com.test;

import java.net.UnknownHostException;

import com.mongodb.DB;
import com.mongodb.DBCollection;
import com.mongodb.DBCursor;
import com.mongodb.DBObject;
import com.mongodb.Mongo;
import com.mongodb.MongoException;
import com.mongodb.util.JSON;

public class ConvertJSON2DBObject {
 public static void main(String[] args) {
  try {
   Mongo mongo = new Mongo("localhost",27017);
   DB db = mongo.getDB("myDBName");
   DBCollection collection = db.getCollection("myCollectionName");
   
   //convert JSON to DBObject
   DBObject dbObject = (DBObject) JSON.parse("{'empName':'Rajkumar Singh','emppId':62990}");
   collection.insert(dbObject);
   
   DBCursor cursor = collection.find();
   
   while(cursor.hasNext()){
    System.out.println("OBJ IS : "+cursor.next());
   }
  } catch (UnknownHostException e) {
   // TODO Auto-generated catch block
   e.printStackTrace();
  } catch (MongoException e) {
   // TODO Auto-generated catch block
   e.printStackTrace();
  }
  
 }

}


Java MongoDB Tutorial

Working with MongoDB with java involves few steps
Step 1: include the java driver into the CLASSPATH
Step 2: start the mongodb service if installed
here is the demo code

package com.test;

import java.net.UnknownHostException;
import java.util.HashMap;
import java.util.Map;
import java.util.Set;

import com.mongodb.BasicDBObject;
import com.mongodb.DB;
import com.mongodb.DBCollection;
import com.mongodb.DBCursor;
import com.mongodb.Mongo;
import com.mongodb.MongoException;

public class MongoHelloJava {

 public static void main(String[] args) {
  try {
   //Demonstrate simple hello java program with mongoDB
   
   System.out.println("Demonstarting simple insert and retrivel in MongoDB");
   // connect to mongoDB on default port and IP address
   Mongo mongo = new Mongo("localhost",27017);
   
   // getDB() return the database from MongoDB,
      //  mongoDB will create database automatically if not existed
   DB db = mongo.getDB("myMongoDB");
   
   // getCollection() returns the collection from MongoDB
   // mongoDB will create collection automatically if not existed
   DBCollection collection = db.getCollection("myCollection");
   
   // create a document to store key and value
   BasicDBObject document = new BasicDBObject();
   document.put("id", 1000);
   document.put("print", "hello  Java");
   
   // save it into collection named "myCollection"
   collection.insert(document);
   
   // query for searching perticular id
   BasicDBObject query = new BasicDBObject();
   query.put("id", 1000);
   
   // fire query
   DBCursor cursor = collection.find(query);
   
   // iterate through cursor
   while(cursor.hasNext()){
    System.out.println(cursor.next());
   }
   
   // Demonstrate getCollection() and getCollections()
   System.out.println("Demonstrate getCollection() and getCollections()");
   Set<String> collections = db.getCollectionNames();
    

   for (String collectionName : collections) {
   System.out.println(collectionName);
   }


   //get a particular collection
     DBCollection collection1 = db.getCollection("myCollection");
   System.out.println("Collection Name is : "+collection1.toString());
   
   //insert the data into the database
   BasicDBObject document1 = new BasicDBObject();
   document1.put("post", "rajkrrsingh.blogspot.com");
   document1.put("author", "Rajkumar Singh");
   
   BasicDBObject comments = new BasicDBObject();
   comments.put("user1", "text1");
   comments.put("user2", "text2");
   comments.put("user3", "text3");

   document.put("comment", comments);
   collection.insert(document1);
   System.out.println("document1 inserted succesfully");
   
   //insertion of the data into the database through map
   Map<String, Object> documentMap = new HashMap<String, Object>();
   documentMap.put("post", "rajkrrsingh.blogspot.com");
   documentMap.put("author", "Rajkumar Singh");
    
   Map<String, Object> commentMap = new HashMap<String, Object>();


   commentMap.put("user1", "text1");
   commentMap.put("user2", "text2");
   commentMap.put("user3", "text3");
    
   documentMap.put("comment", commentMap);
    
   collection.insert(new BasicDBObject(documentMap));
   
   DBCursor cursor1 = collection.find();
   while (cursor1.hasNext()) {
    System.out.println(cursor1.next());
   }
   
  } catch (UnknownHostException e) {
   e.printStackTrace();
  } catch (MongoException e) {
   e.printStackTrace();
  }

 }

}


Result


Wednesday, June 6, 2012

All About MangoDB


NoSql DB is one of the latest trends in the market which most of the big names in the industry are investing in and are getting benefited by its huge spectrum of features. The common feature associated with NoSQL are Storing huge Data & Scaling up Storage, Interconnected Data, Complex Data Structure, High performance and Flexibility with schema less approach.

Major Internet giants like Facebook, Twitter, Digg, Amazon, LinkedIn, craigslist, Foursquare and Google all use NoSQL in one way or another because of the significantly different challenges in dealing with huge quantities of data that the traditional RDBMS solutions could not cope with.


MongoDB (from "humongous") is a scalable, high-performance, open source, document based NoSQL database used by company like craigslist, Foursquare, Disney, MTV and many more.


Tuesday, June 5, 2012

MongoDB Tutorial : Getting Started

MongoDB is no SQL,open source database, written purely in C++, basically store the database in the document form.
based on the JSON approach,can be horizontally scalable,can be index on any attribute

Here are the best practise to use


How to download and Install MongoDB
Download the MongoDB from the MongoDB website as depicted in the picture as per your
plateform,here I am downloading it for the Windows 32 bits.


Download the relevent Driver to work for
The fallowing page shows the link for the driver,Here I am working with the Java Driver.


Review the downloaded bineries
After downloading MongoDB,extract the zip file which contains the fallowing exe files as shown in the image.


Installing the MongoDB server
Intalling the MongoDB server is not a time taking process,just open the command prompt and go the location of bin of the unzipped folder,in the meanwhile create the
database folder as MongoDB does not create the database itself.

execute the fallowing command mongod --dbpath "f://mongodatabase"
and press enter the fallowing screen show the out that your server is up and running on the default port 27017


Test your DB Installation
Open the web browser and type the fallowing addres http://loacalhost:27017/
The webpage displays the welcome page of mongoDB same as the image shown.


Connect to MongoDB
Open the command prompt, open the bin location


run the MongoDB as a Windows Service
open the command prompt and execute the fallowing command
mongod --dbpath "f:\mongodatabase" --logpath "f:\mongodatabase\logs.txt" --install --serviceName "MongoDB"
here shown the output on the console


The Next step is to verify from the service manager


Uninstall
Use the remove command shown in the image.


Create Database in the MongoDB
MongoDB does not provide any command or syntex to create database as provided with the relationship based
database,it creates the database on the fly when you try to insert the values first time in the database.

on the shell use show dbs command which shows the local(empty) database


use databasename command will create your MongoDB,but the database has not been created yet you can
verify the same by using show dbs command.
The database only created when you try to insert some document into the database
Define a collection name as employee and let try to insert some document inside it